Getting Started with Underwater Photography – Part 1 – Buoyancy
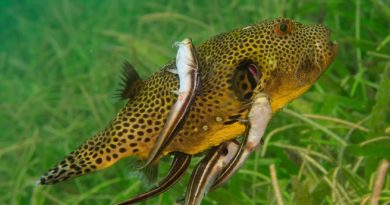
Nice photograph, isn’t it? Interested in taking shots like this one yourself? Then follow this 10-part series about getting started in underwater photography, starting with this post. I’ll take you by the fin and lead you to a point where you can take at least reasonable and maybe even really good shots under water.
What is the very first thing you need to do? Quite obviously it is to become a skilled scuba diver! If you aren’t already certified, then head to your local scuba shop and sign up for a class. They will teach you how to assemble scuba gear, how to not kill yourself with it underwater, and what to do if something goes wrong. Will this initial, “open water”, certification make you into a good diver? No!

You will still have a lot of practice to do on your way to become underwater photographer material. So if you are a complete novice diver or even someone with a hundred dives under your weight belt, I recommend spending a few dives practicing your fining and buoyancy skills to build your skill base for underwater photography.
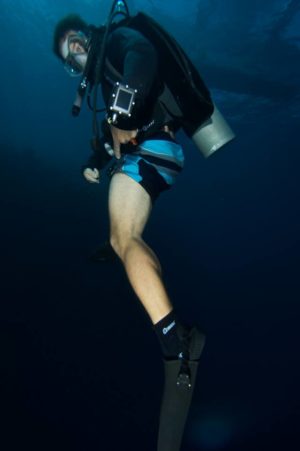
I like to think of myself as the inverse-Michael Phelps. I am very good at swimming very slowly or even standing still in the water. This is what you have to be able to do as an underwater photographer: hover in place motionlessly. Practice it: find a pebble on in the sand below you. Point at it with your finger, without touching it, and then stay in the same position relative to that pebble for a minute or two. Try it in different positions, in a traditional horizontal scuba pose, on your side, and head-down. Don’t use your hands to stabilize your hovering positions, and use your fins as little as possible. The amount and distribution of your weights (On your weight belt? Some of it on your tank? Play with these parameters!) should be so ideal that almost no correction movement is necessary in the absence of current. Breathe calmly and shallow, as to not change the amount of air in your lungs and hence your buoyancy too much during your breathing cycle. Practice the same skills in spots exposed to some amount of current. Now you’ll have to fin to maintain a constant position. Learn to exactly offset the current.
Now, laying down on the corals or sponges beautifying the dive spot is completely out of the question, and gripping a piece of live coral with your whole hand is as tasteless as blowing your nose into a medieval manuscript. As responsible underwater photographers, we want to minimize our impact on the marine environment. What I think is acceptable, though, is a careful 2-finger anchor on a piece of dead rock. Point your fingers as if you’re mimicking a gun, and firmly place them on a barren spot of the reef to counteract a moderate amount of water movement. This technique will not make up for catastrophic failures in buoyancy, but it can give you the extra little piece of stability you need for a top shot.
Also, practice your fining! Very often, a frog kick or a modified frog kick is preferable to the classic, free-style like fin kick. In the frog-kick, the thighs are maintained in a horizontal position, and the calves are rotated outwards, somewhat akin to the kick used in the breaststroke swimming-technique. In the modified frog-kick, only the ankles rotate the fins. These two kicks are often used by cave-divers for the same reason I recommend them for underwater photographers: They kick up less sediment into the water column, and they allow for finer maneuvering in the water.
Practice these skills over and over! You can do all of that with your buddy at your local dive site, even if that is just a quarry. Maybe take a “peak performance buoyancy” class and tell your instructor that you want to focus on these techniques. If you are already at an advanced training level, consider taking technical diving training. In tech diving, good buoyancy makes the difference between happy post-dive beers and an emergency trip to the decompression chamber, so these skills are extensively trained.
It’s no use dragging a camera trough the ocean if you can’t calmly put it into the right place close to the marine animals you’d like to photograph. Only once you are good at being really still underwater should you think about step 2, getting the right camera and housing for you, which I will write about next week!